Crawl wizard
With the Crawl wizard tool, you can configure and run a crawl. In this article, we will discuss the configuration options, the results and statistics, and also the possible reasons behind a failed crawl.
STEP 1 - Type
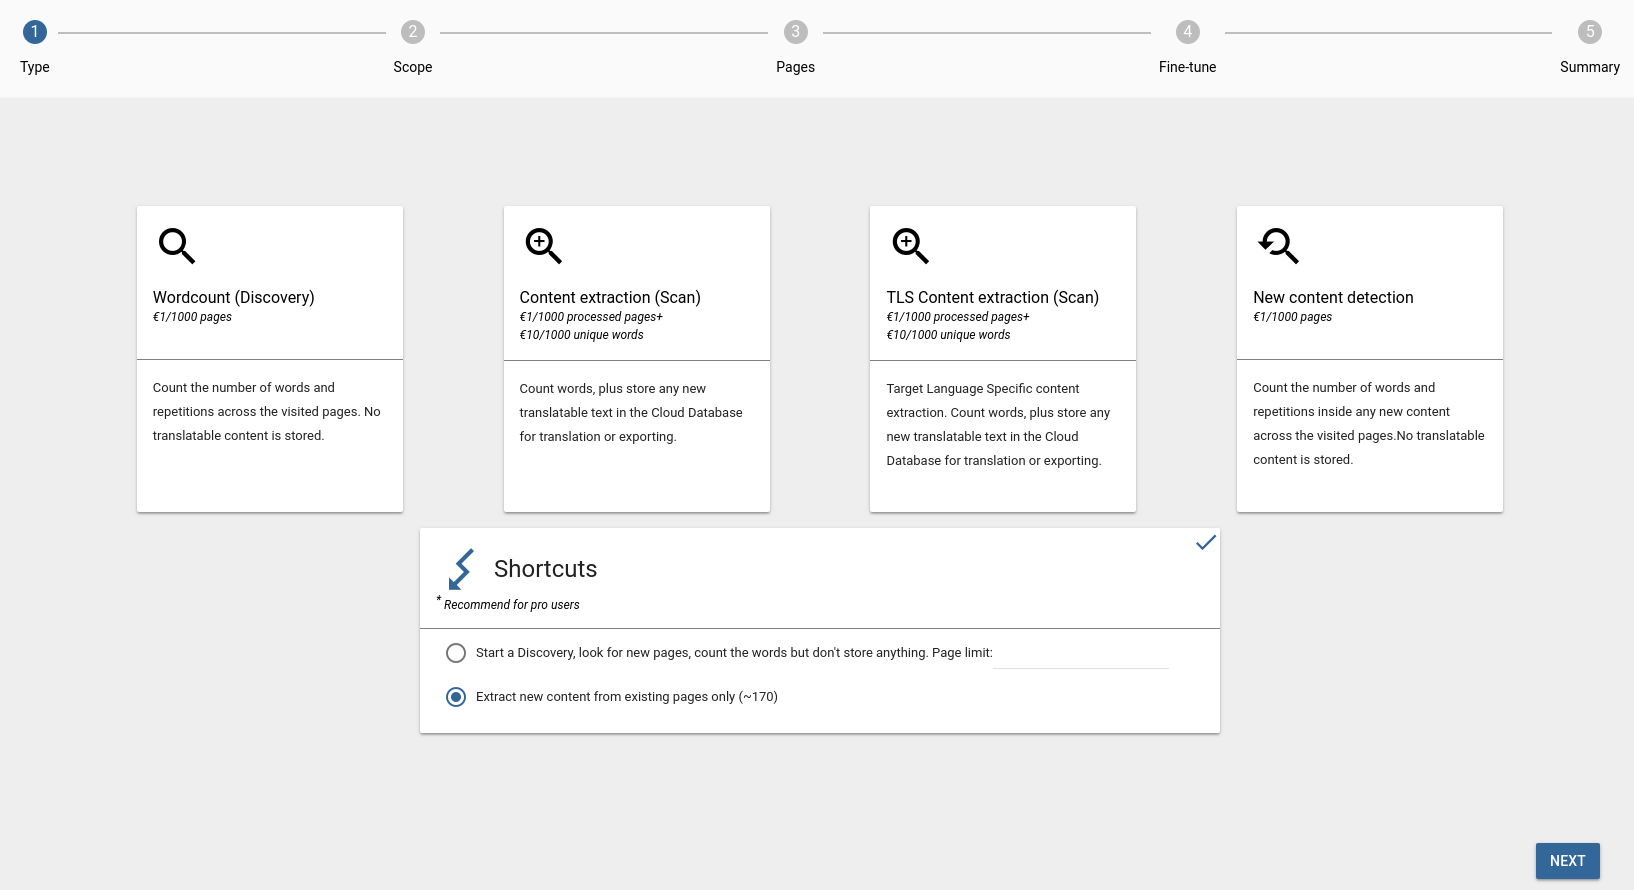
There are four types of crawls, but most of the time, you probably will see three of them as a selectable option in your crawl wizard.
Wordcount (Discovery): The process maps the structure of the site by scanning each page for link elements and trying to follow these links. The content of the website is not stored, only the URL address of the visited pages, together with their status info.
Content extraction (Scan): It extracts and stores the source content to be translated. New source words added to the database are billed, therefore care must be taken when starting Scans.
New content detection: It runs through the set of pages selected for translation, but it does not store content at all, it’s just providing a wordcount statistics based on pre-existing source entries.
TLS Content extraction (Scan): When the translatable site has various content by target languages, and the remote server would serve the requests based on the given locale codes, you can ingest the content with this type of crawl.
You can read more about the selectable crawl options here.
STEP 2 & STEP 3 - Scope
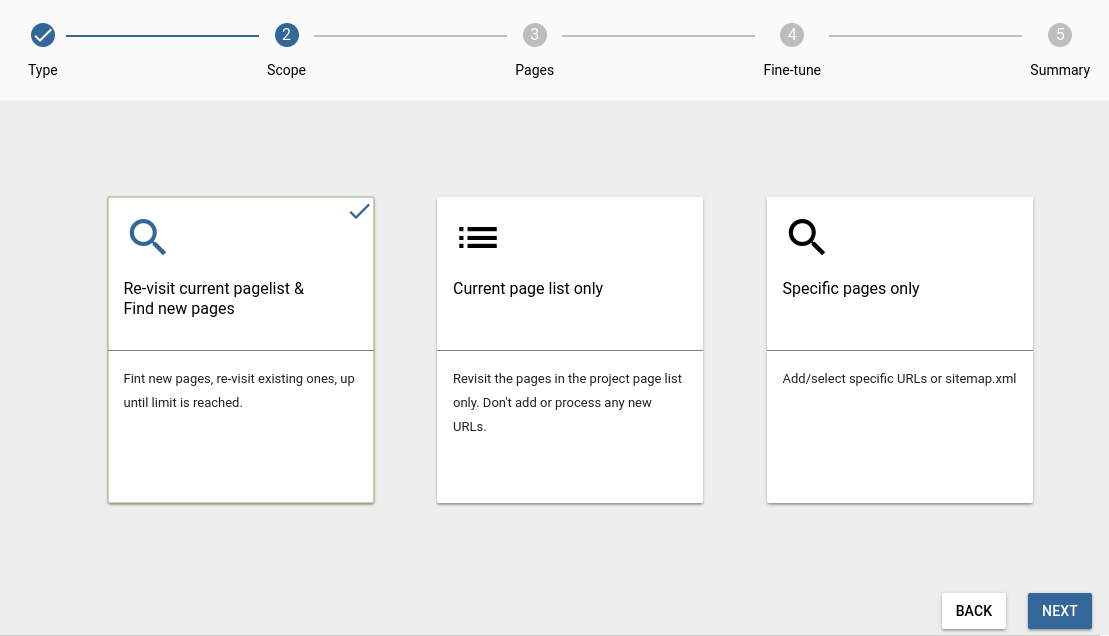
Re-visit current pagelist & Find new pages: The crawler visits the existing pages first, and during this process, it also collects new pages, which will be visited after the current pagelist. In the next step you can set a page limit, but please note, that if this number is smaller than your pagelist, the crawler won’t visit new pages.
Current page list only: New pages won’t be added or processed, just the pages that already exist in your project. In the next step, you can check this list.
Specific pages only: By selecting this option, you can specify a specific URL list or sitemap (in .xml format), and in this case the crawler will visit and process only these pages, unless you selected JS, CSS resources and/or images, binary resources as collectable resources, because in this case these will be visited as well, and added to Resources. If you select the option Also add new URLs not in the list above, if referred, but as “Unvisited” (takes precedence over Page Freeze setting!), and the specified pages contain links, then those will be added to the pagelist as Unvisited.
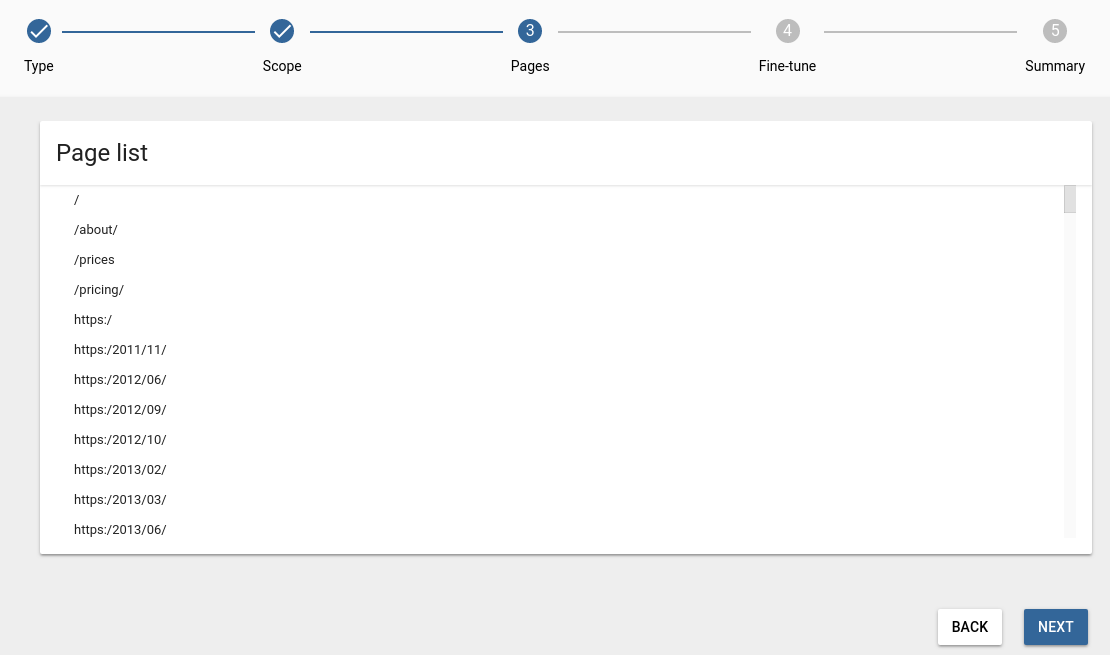
STEP 3 - Pages
The content of this step will change based on the previously selected Scope option.
If you select the Re-visit current pagelist & Find new pages in STEP 2, then you can limit the number of pages:

If the selected option is Current page list only in STEP 2, you will see this list:
Selecting option Specific pages only in STEP 2 enables you to add the pages you would like to scan, or you can also provide a sitemap:
STEP 4 - Fine-tune
Origin (Source) snapshots
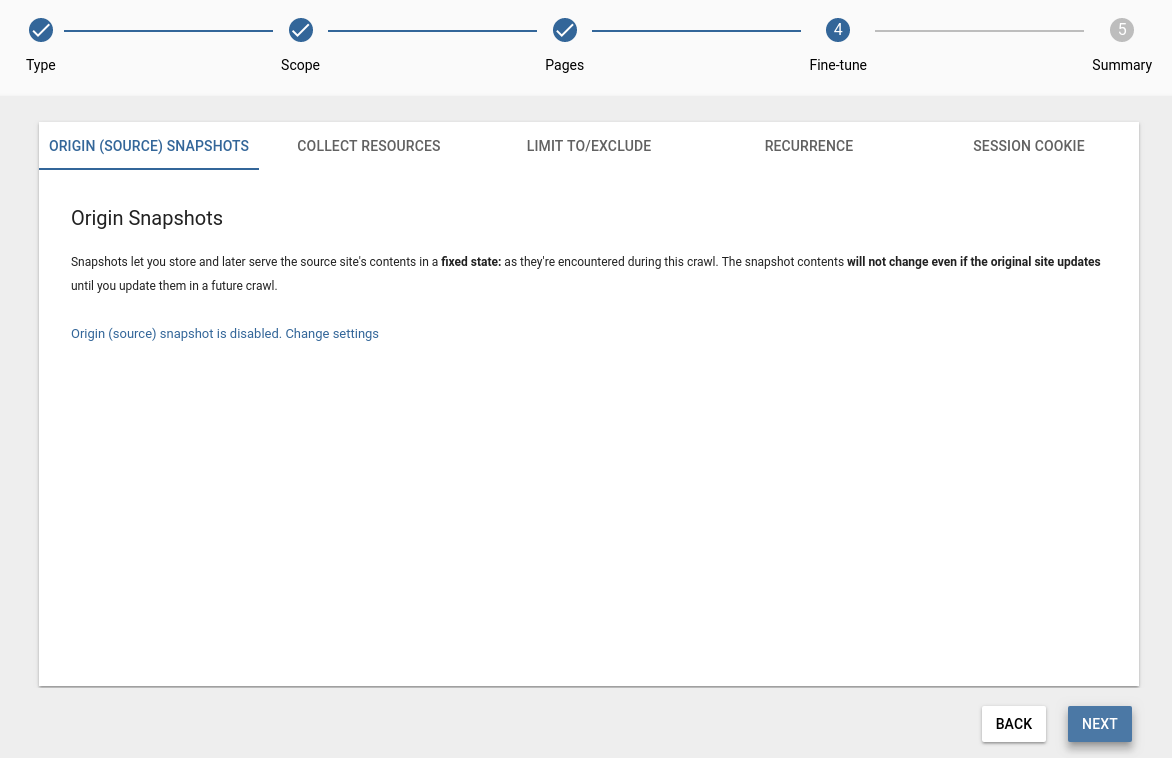
You can create and enable a new Origin Snapshot in the Snapshot menu in Dashboard 2.0. Note that you need to run a Content extraction (Scan) or TLS Content extraction (Scan) for content to build the Origin Snapshot before it becomes functional. In this step, you can configure the origin snapshot.
Reuse existing pages and store new pages: In this case, you instruct the Crawler to skip the pages that are already in the Snapshot you choose and thus reduce the building cost. The choice of whether or not add new pages gives you the possibility to simply ignore the new pages that were added to the source site.
Reuse existing pages and don’t store new pages: Selecting not to add new pages allows you to build a snapshot that has the pages updated but no new ones added. This option is useful if you made changes to the JSON Paths and as a consequence need to rebuild the Snapshot. As a result of building the Snapshot, all content that was set to be picked up by the Scan is added to the current Snapshot.
Don’t reuse existing pages, update/store all encountered pages: Choose this option when it is the first time you build an origin (source) snapshot or if you want it to reflect the state of the site at the time of crawling.
Collect resources
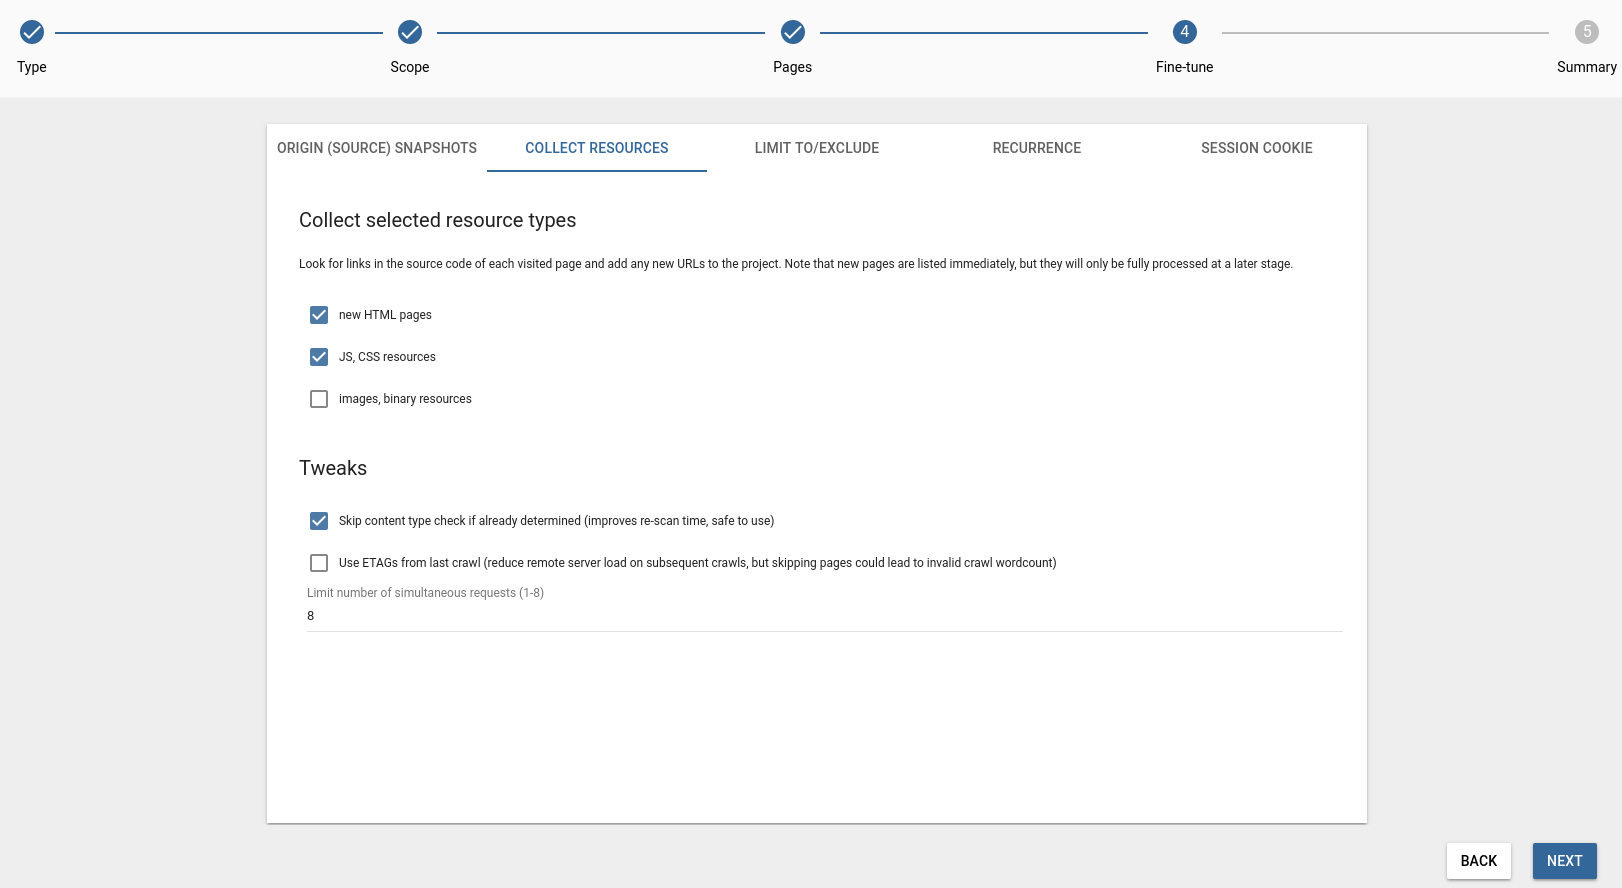
Collect new HTML pages: Any pages the selected crawling process finds during a crawl will be added to the page list. Note that this is an explicit action by the user, therefore the Page Freeze setting does not affect in this case.
Collect JS, CSS resources: Instruct the crawler to add newly found Resources to the project. The proxy makes collecting Resources a trifle, and there are a plethora of in-depth methods to translate content embedded within them. But the translation of Resources is also known to be one of the trickiest parts of website localization. Beware, and woe betide the unready!
Collect images, binary resources: By enabling this option, image or any binary content found on the site is added to the Resources screen, where you can add localized counterparts and instruct the proxy to serve those in place of the original.
There is often a great deal of image content on websites, so indexing all of them can take a very long time to finish; it is a good idea to turn this option off the first time around, and enable it only later, when it is clear that image localization is also going to play a part.
Also collect resources from external domains: Allows you to pick up resources that are linked to on the site.
Collect short links: WordPress sites tend to give a shorter link to every page in the form of https://www.example.com/?p=123456. In most cases these are safe to ignore as they merely duplicate content available on other links but due to misconfigurations, they can contain content that you want to ingest.
We recommend that you only select Collect new HTML pages as that’s where the majority of the content is likely to be. Resources that you need to localise can be added later using the pages list. This allows you to keep the Pages list as short as possible and thus improve manageability and reduce the time crawls need.
Skip content-type check if already determined: Enabled by default since it only applies to already crawled pages.
Use ETAGs from last crawl: Disabled by default. You can read more about ETAGs here. By enabling this option you could reduce remote server load on subsequent crawls, but also note, that skipping pages could lead to invalid crawl wordcount.
Limit number of simultaneous requests Control the number of requests a crawl is allowed to send to the original site simultaneously. Use this function to prevent the crawl from flooding a smaller server with requests.
Limit to / Exclude
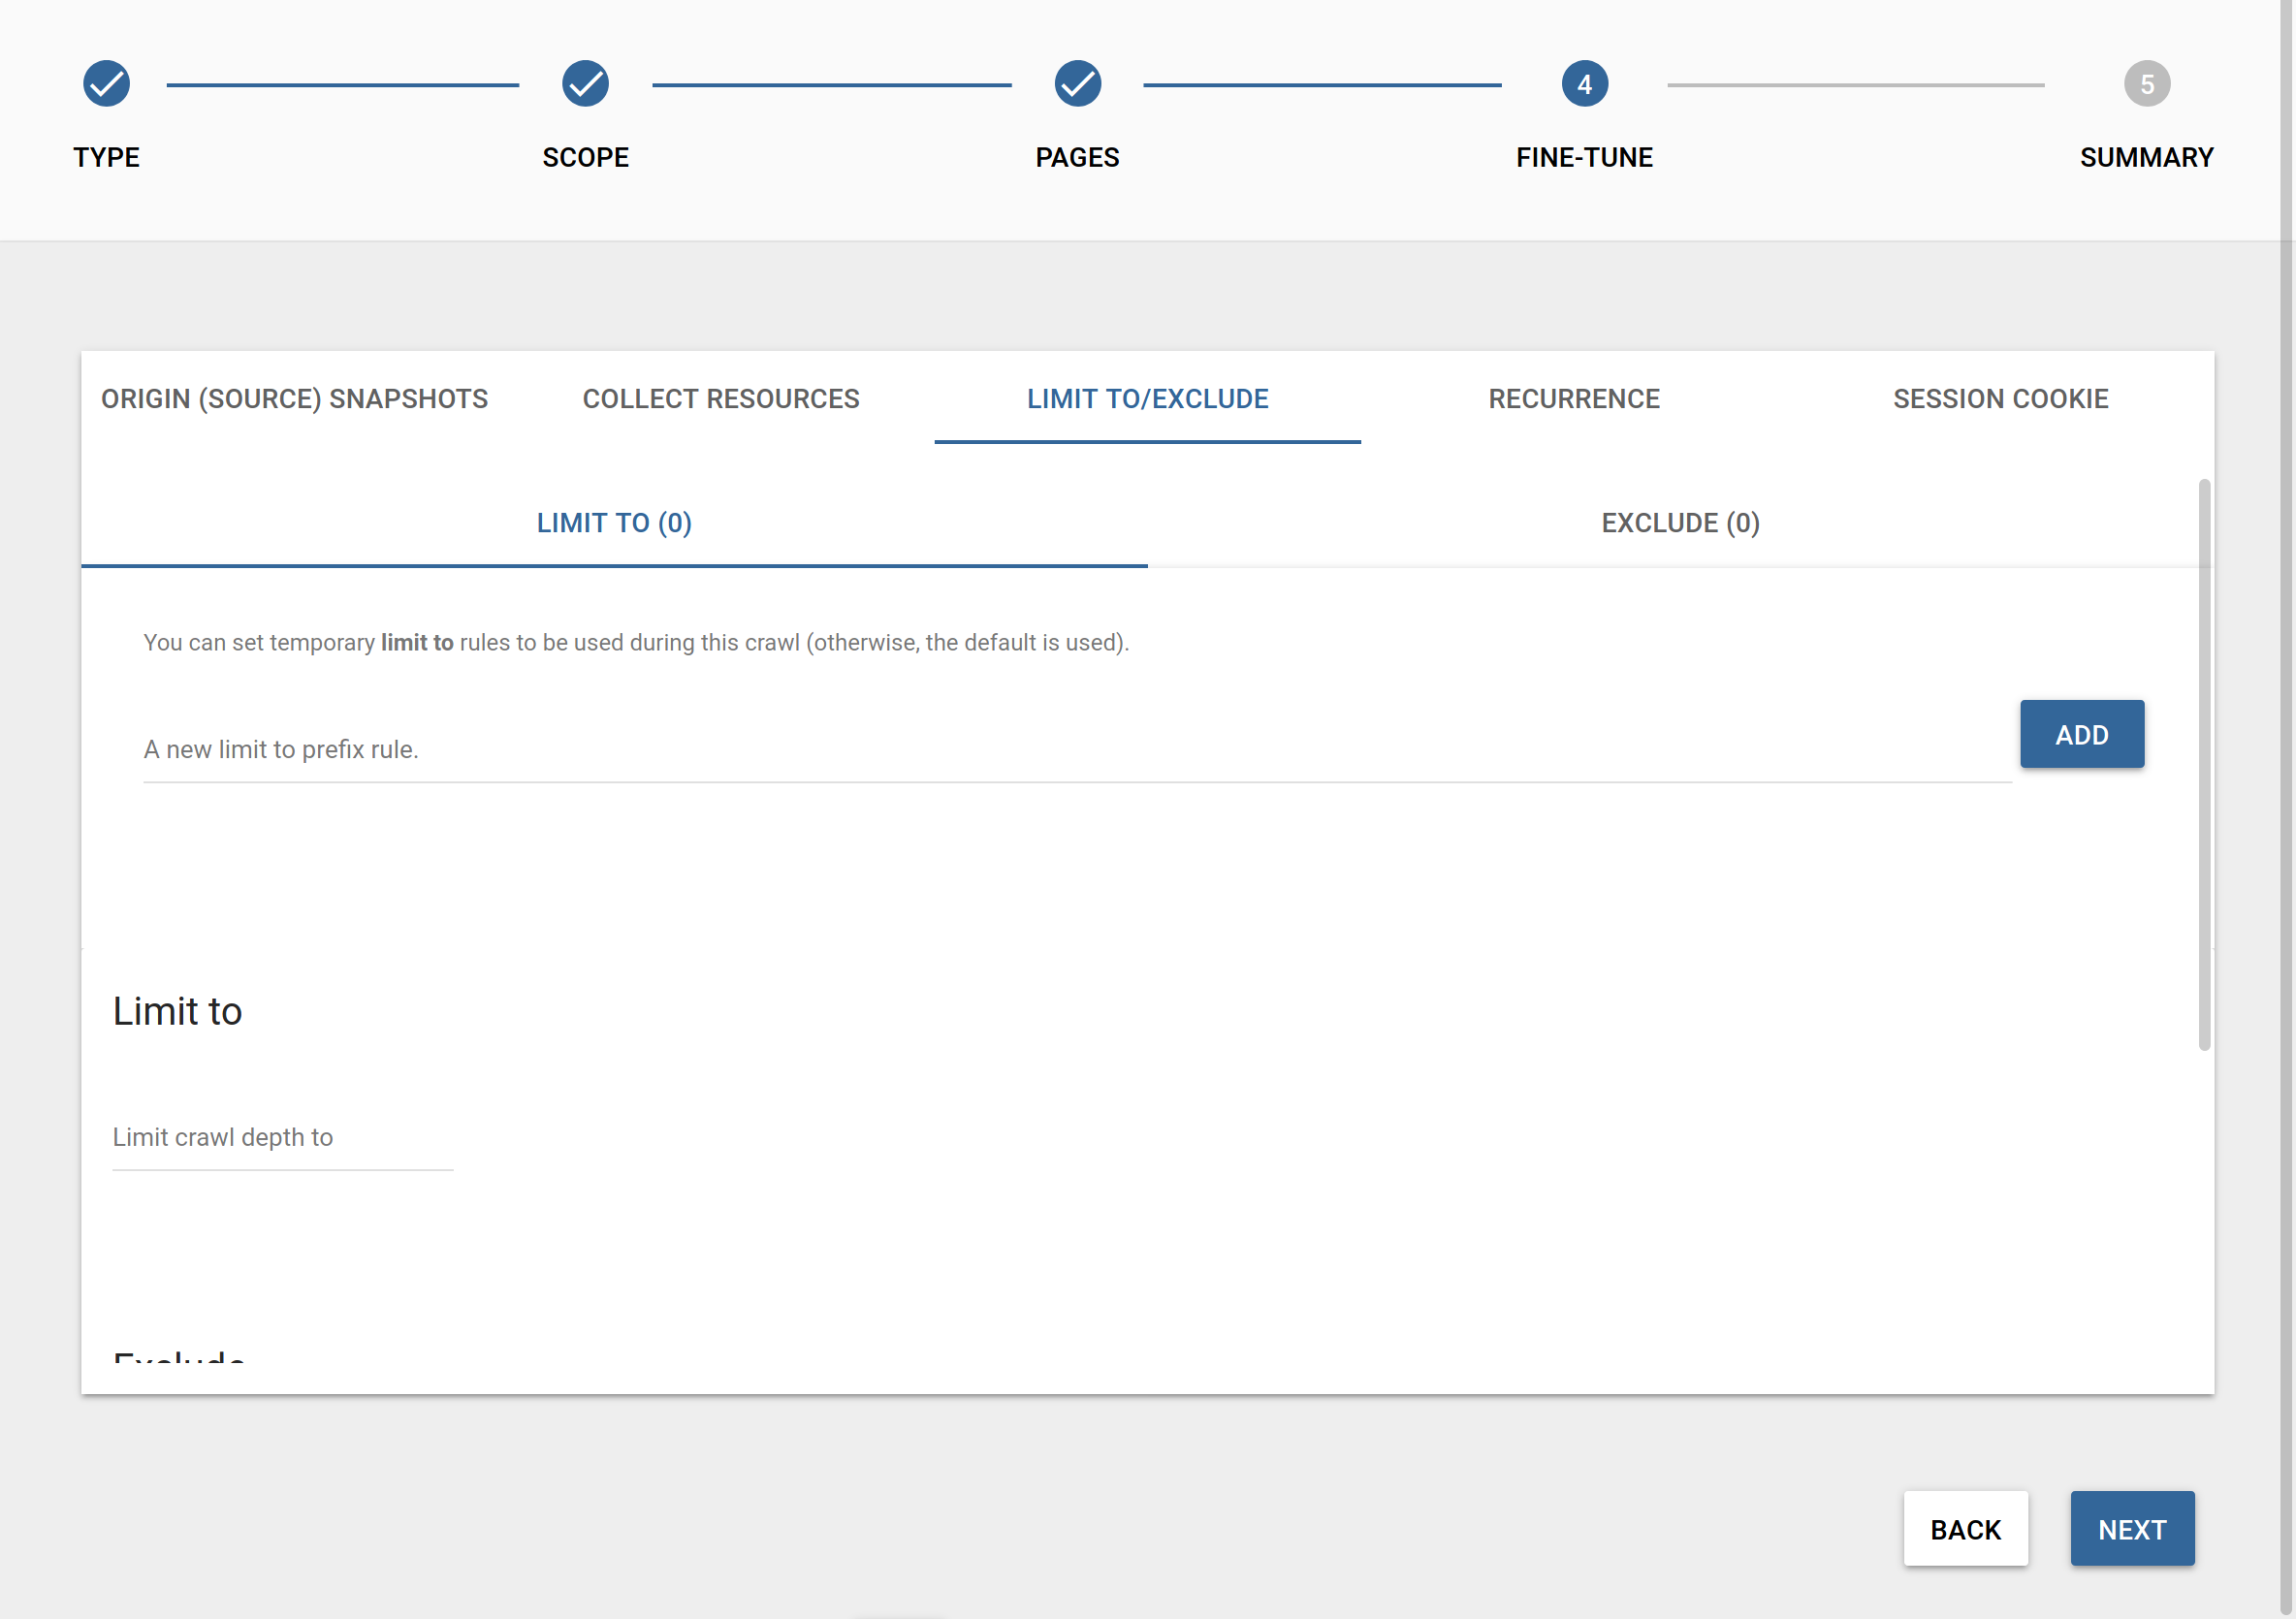
Limit to rules: You can set prefix-based rules here, which will temporarily set the scope of the crawl. For instance, if you add a single inclusion prefix /en/, the crawler will only process pages that can be found in the /en/ directory.
Exclude rules: Set prefix-based rules, which will temporarily exclude the given directories from the scope of the crawl.
Limit to: There is more than one way of limiting the scope of a crawl. In scenarios where you have to crawl richly interlinked pages (a wiki, for example) you can use the crawl depth to limit how deep the crawl should be allowed to follow links.
Exclude: You can specify any regex to apply to all URLs and ignore the given page if there is a match. This is a user- and crawl-specific setting. As always, we recommend that you test your regular expressions on regex101.com before using them. In this case, you can export your page list from the pages list on the Dashboard 2.0 and use that list as a test string for your regex.
Recurrence

Here you can set scheduled crawls, which will automatically extract new content at daily, weekly, or monthly intervals. You can read more about recurring crawls here.
Session Cookie

You may extract the cookies from a user session and pass them to a crawl. This feature is most useful when you need to deal with login walls and content that is only revealed within the context of a user session.
Note that we cannot guarantee that the cookie extraction method works with all proprietary logins, as there are several solutions which can use additional security measures such as IP checking, or checking the User-Agent header. As all the requests from the proxy and the crawler come from the Google Cloud, it is necessary for the target site to not block them. The success of a crawl via the use of session cookies is highly dependent on the implementation details of a site.
You can read more about extracting cookies that you can pass to crawls here
STEP 4 - Summary
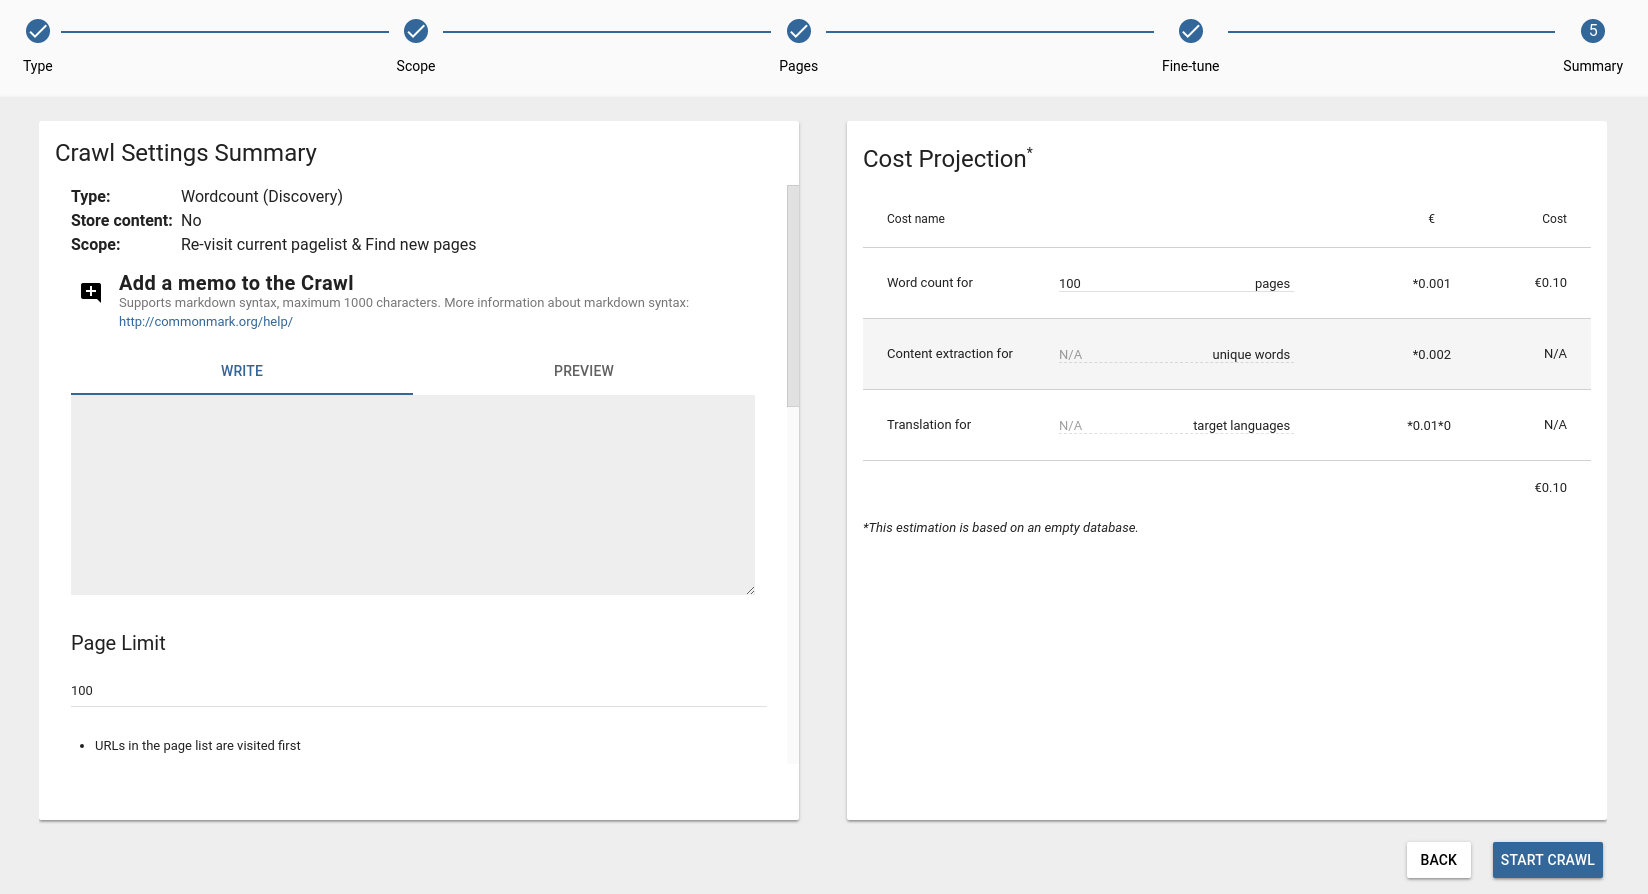
As the last step you can check the crawl’s settings, and also a Cost projection will be displayed for you. Please note that this estimation is based on an empty database.
The statictics will be emailed to you and made available in the crawl list where you can use the Statistics card or the Crawl analyzer tool.