JavaScript publishing
This section contains key settings for Basic publishing as well as the one line of JavaScript to embed the translations to the original website. There are five sub-sections.
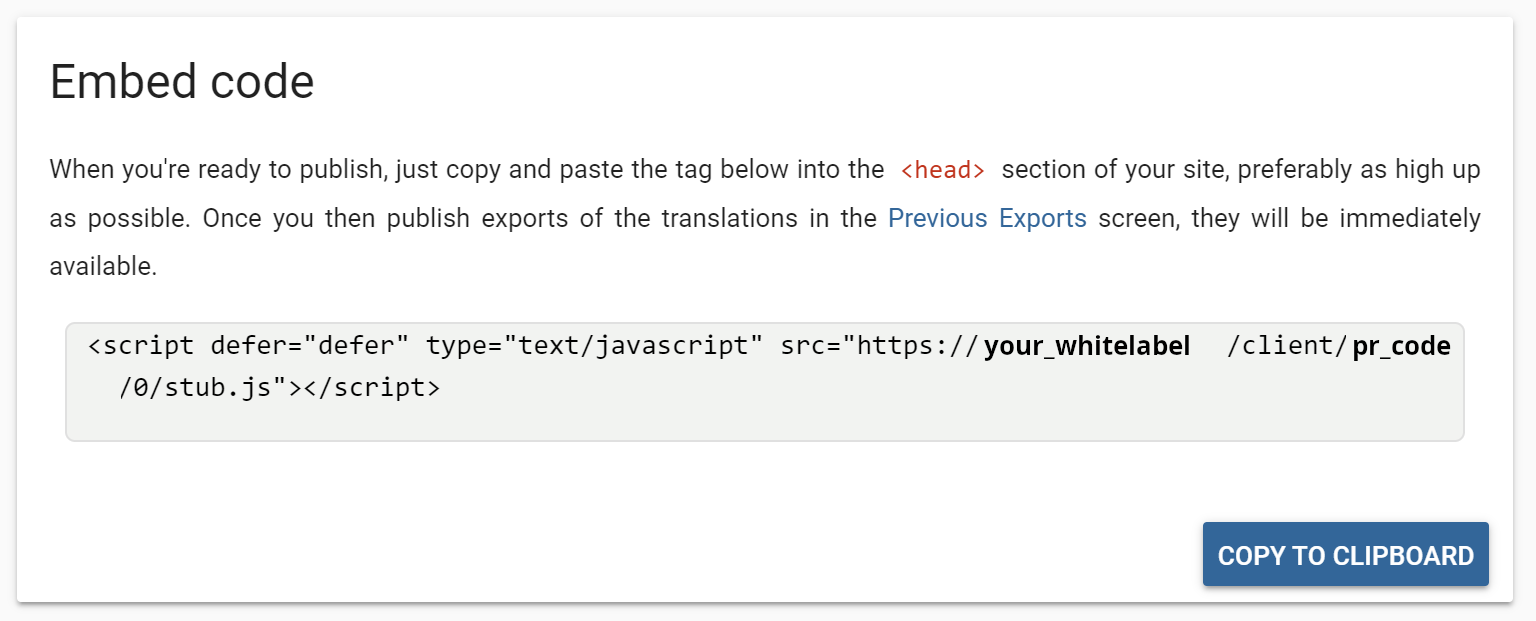
Embed code
This part is the most important for the publishing process. You can embed the client-side translator engine via one line of JavaScript code that you can find here. Use the Copy to clipboard button, then add it to the website.
Tweaks
These checkboxes are fairly similar to those that you can find on the Advanced settings section. They influence the behaviour of the translator script.
Note that the majority of these tweaks change the embed code, so after changing them, please make sure to update the code on the website.
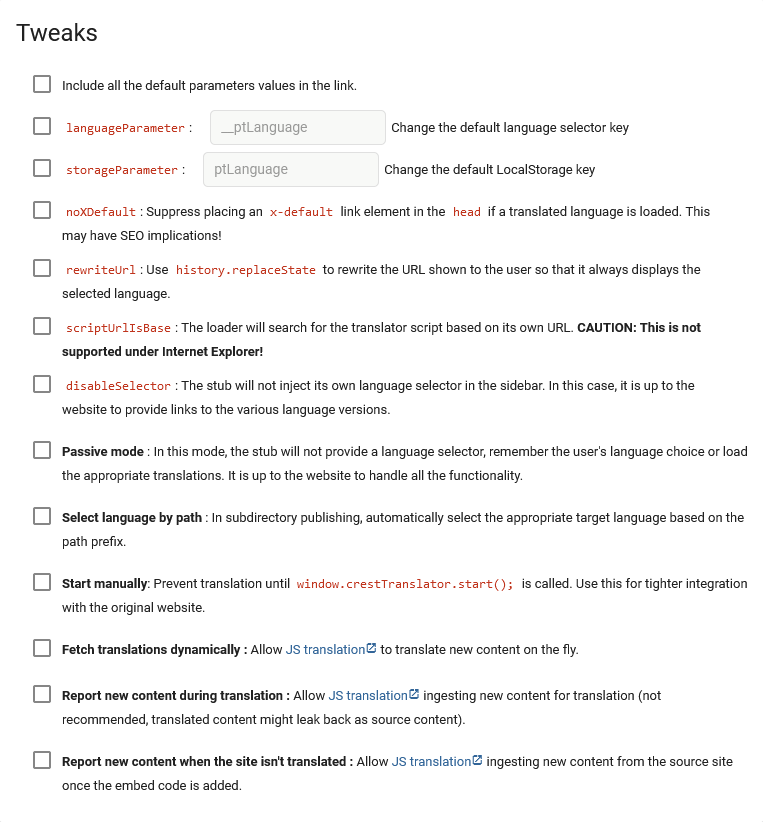
There are lots of options here:
Include all the default parameters: By default, the embed code is kept as short as possible. To achieve this, tweaks that aren’t enabled aren’t included in the URL. This tweak allows you to include them all.
Language parameter: By default, you can change the target language by appending
?__ptLanuguage=${target_language}to the URL of the site. With this option, you can change it from__ptLanguage.Storage parameter: By default, the user’s language choice is stored in LocalStorage under
ptLanguage. Change it with this option.noXDefault: By default, the translator adds anx-defaultlink element to the translated website. With this option, you can prevent this.Rewrite URL: By default, the target language is hidden in the URL. Use this tweak to ensure that
?__ptLanuguage=${target_language}is always present in the URL.Script URL is base: The injected script loads further translator scripts, one for each target language. Use this tweak to try loading them from the original site’s domain. Use this feature if the JavaScript exports are uploaded to the original server. Note that this isn’t supported under Internet Explorer.
Disable selector: The translator script adds the sidebar language selector by default. Use this tweak when a custom language selector is in place.
Passive mode: In this mode, the translator script leaves the language selection and persisting that choice up to the original website. This can be used for retaining full control over the language selection. Note that with this enabled, no translation will take place until the original site selects a language. Navigating will also stop translation unless that choice is persisted in localStorage.
Select language by path: This feature is used to create an experience matching that of subdirectory publishing (like
www.example.com/fr-fr/). To set this up, you must edit the original website. Just copy the contents of your site in the source language into a folder matching the target language. Then, when someone visits these pages, if this option is enabled, the translator script will activate automatically and show the translations.Start manually: With this option enabled, the translator script will not start translating until its API is called. Use this option when a functionality of your site requires that translation doesn’t start until a specific time. For example if your website uses server-side rendering. In that scenario the site will hydrate, meaning that elements start off as non-interactive when the site loads and immediately after, the site will add the functionality. This may interact with the translation process. In this case, when hydration finishes, the site must call
window.crestTranslator.start();.
Content ingestion
The last three options allow you to handle how the content is handled with relation to the JavaScript translation.
By default, you must export the content of your website into a JavaScript export. However, when a website is updated regularly, creating a new export for every update can become tedious. The solution is the Fetch translations dynamically option. With this option enabled, if a segment’s translation isn’t available in the export, the system will query our servers to see if the translations are available in the translation memory. If they are, the segment will be translated. Note that creating JavaScript exports is still recommended because loading the translations in the export is faster than querying our systems separately.
In a similar vein to the above, with the Report new content during translation option enabled, if the translator script finds new content, it reports it to our servers. The new content then gets ingested. It is very similar to the way Translation Proxy works. During serving new content gets picked up.
The Report new content when the site isn’t translated is similar to Report new content during translation. The difference is when new content is detected. With this option, as opposed to Report new content during translation, content will be gathered when the site is not translated. This prevents a scenario where translated content could be accidentally ingested as source content.
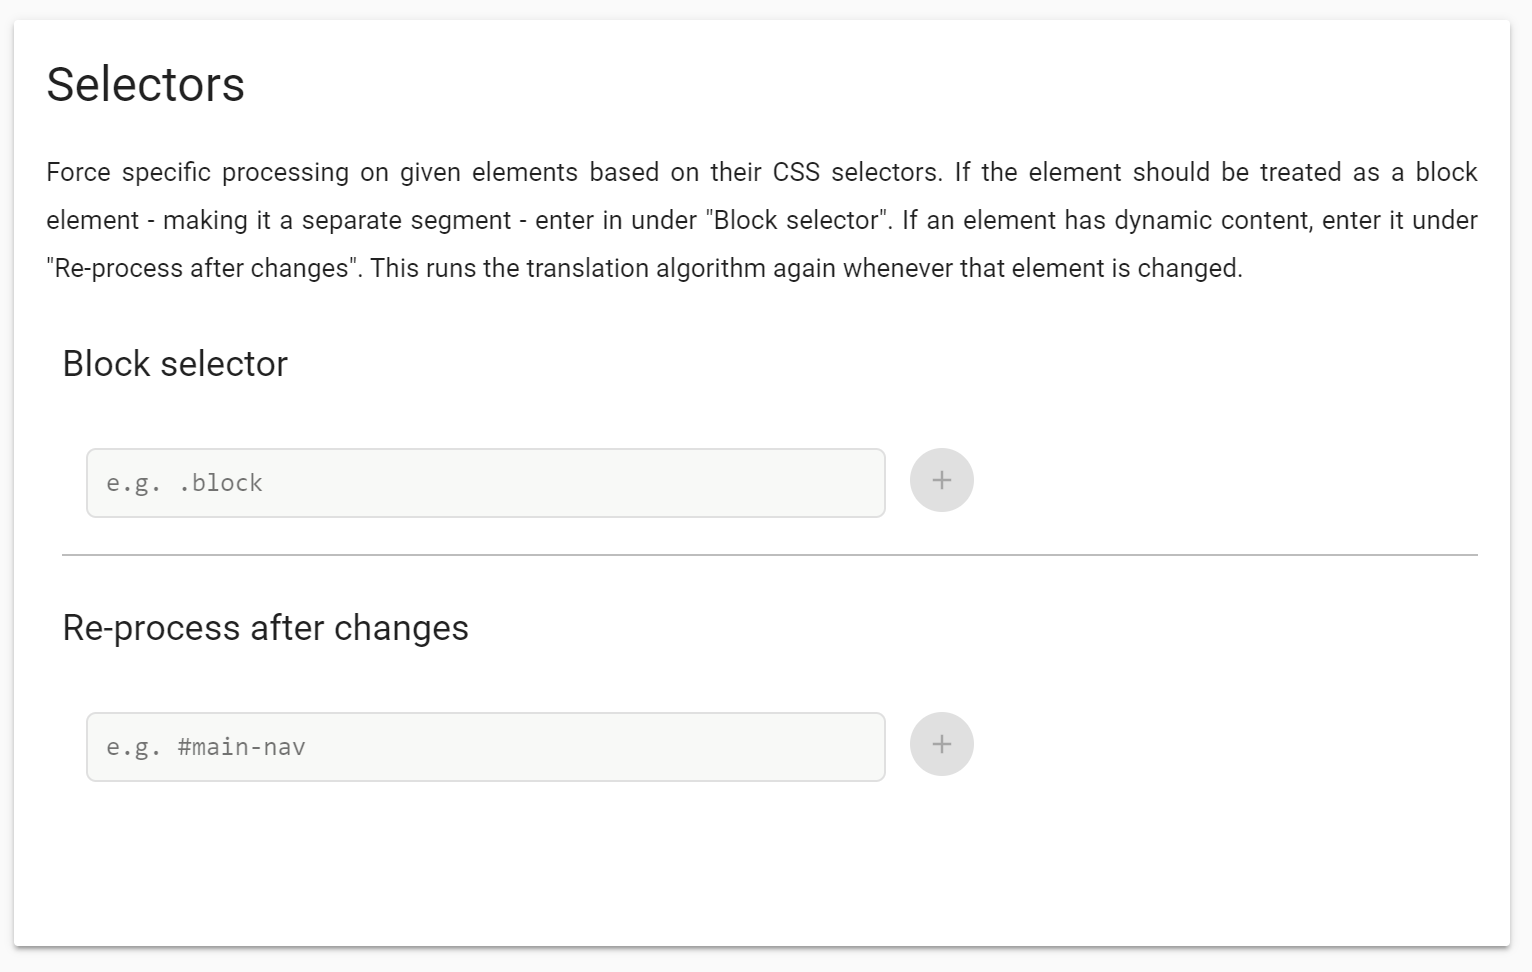
Selectors
In this section, you can enter CSS selectors to influence the behaviour of the translator script.
Block selector
HTML documents, such as webpages, have block and inline elements. W3Schools has a great page about them. The translator engine treats them differently by default. Block elements become their own entry in the Workbench. If you need to treat an inline element as its own block element, just enter its CSS selector here.
Re-process after changes
The translation algorithm translates every element on the page once. When the text of an element is changed, but the element itself isn’t, it isn’t re-translated because at that point it may contain mixed-language content.
You can enter CSS selectors to force a translation update on change here.
WARNING: Using this feature can result in translated content, or partially translated content, being ingested as source content.
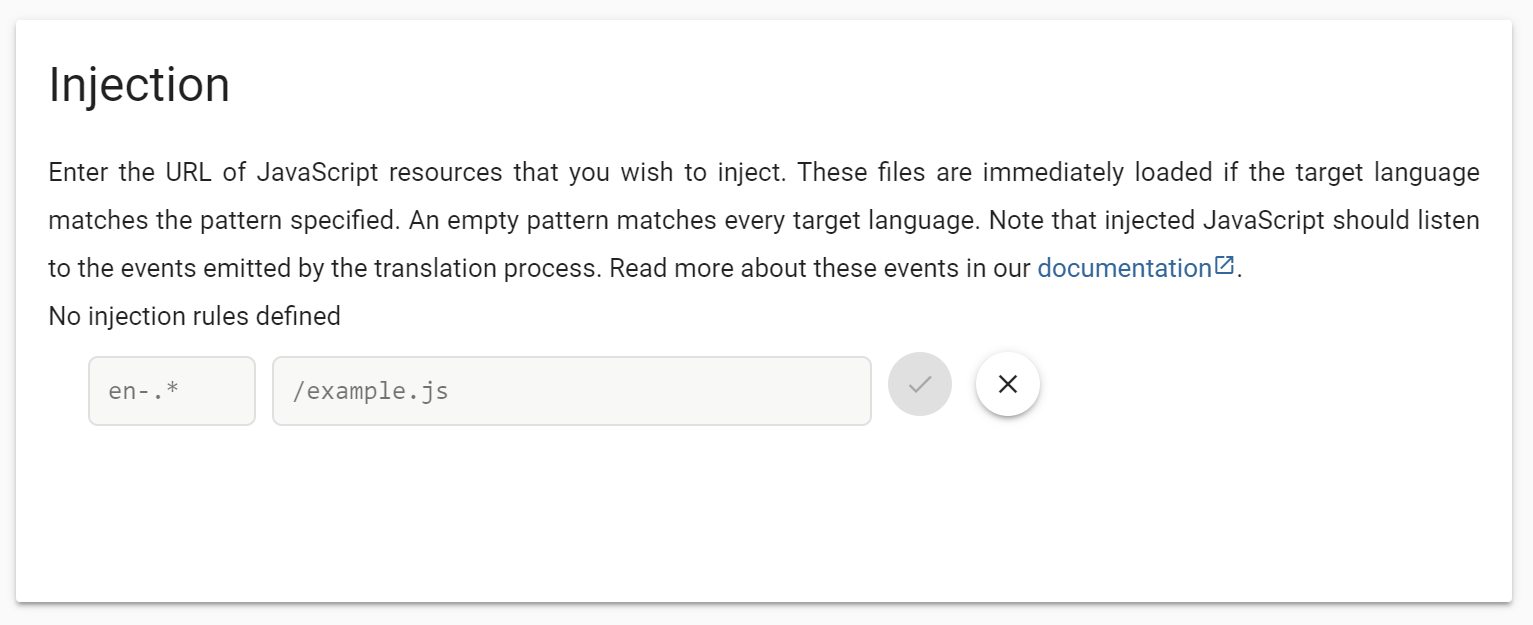
Injection
Here, you can specify JavaScript files that are injected to the website, even when the source language is selected. This way, you can make any change required both to the original and the translated websites. You can use this feature, for example, to customise the language selector or to add an overlay while the translations are being added to the website.
TIP: Write your JavaScript code to a Page content override making sure that the content type is set to application/javascript. Then, you can inject the temporary domain of this override.
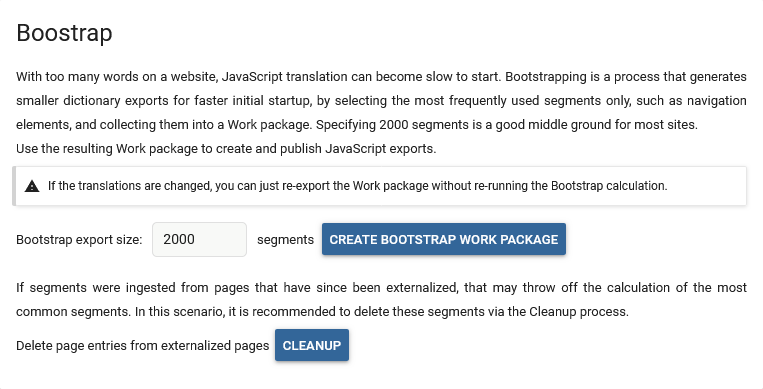
Bootstrap
If your website is particularly large (e.g. over 250,000 translatable words), the JavaScript exports may become too large. The result is that loading them can be too slow. The solution is to create a smaller JavaScript export that is quick to load and then using the Fetch translations dynamically option for the remainder of the content. This can considerably speed up serving. But the question is which segments should be in this smaller export. The best starting point can be the segments that are found on the most pages. This would usually be the navigation, the footer, etc. The bootstrap option allows you to create a Work Package with exactly these segments.
First specify the number of segments to include. 2000 is a good baseline. Press the Create bootstrap Work Package option. Once the Work Package is created, you can create this smaller JavaScript export and publish it. Note that when you need a new JavaScript export, you don’t need to create a new Bootstrap Work Package, you can just re-export the one you previously created.
There’s a final option here, Cleanup. This is required when pages were deleted or externalised from the Pages list. When there are a large number of these, it is recommended to run the cleanup process. This ensures that future Bootstrap Work Packages will count the number of pages where a segment is visible correctly.